
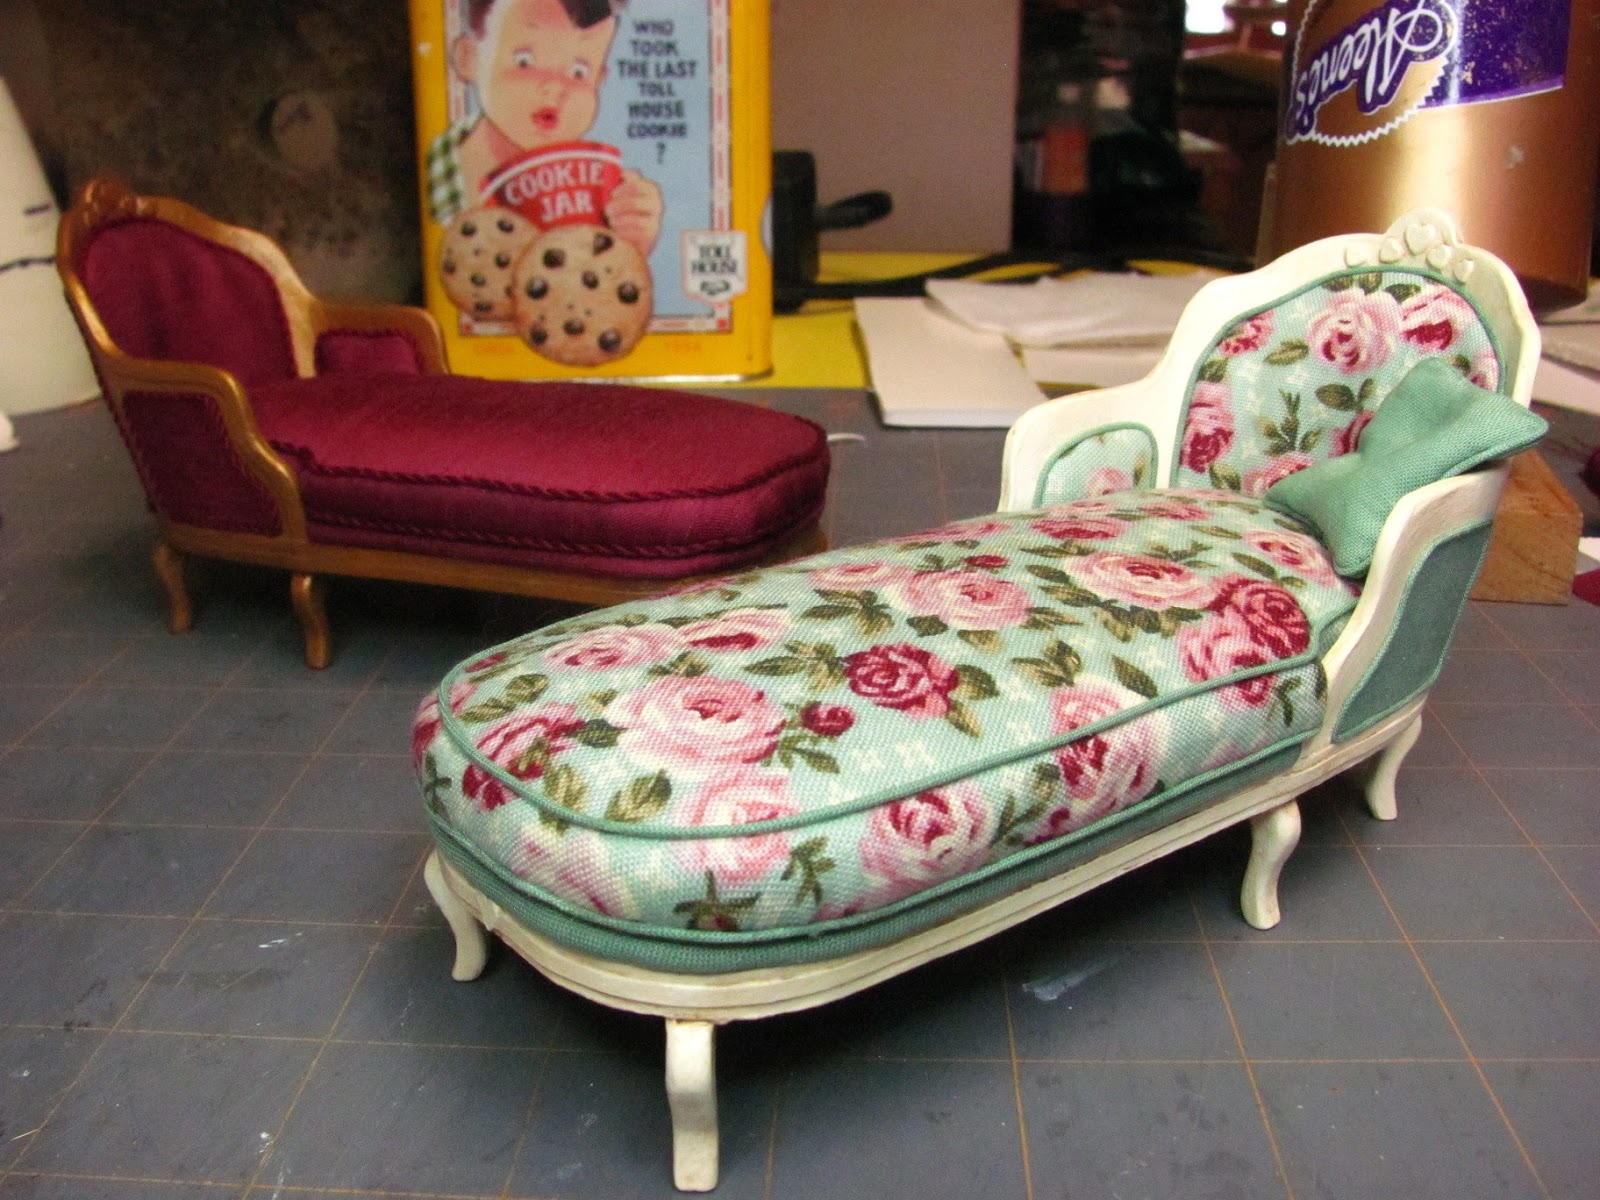
This is the project for this month. This French chaise is made from card stock, foam core and mat board. You could trim off the front of the chaise and make a chair.
The chaise in front, the one with the patterned fabric is a little longer than the pattern included. It was my prototype for the blog and I felt the chaise needed to be a little shorter. The length is up to you if you want to change it.
Below are the patterns. On the left side of the blog is a listing, "Things to do, Things to see", in this listing is a post, "HOW TO RE-SIZE THE PATTERNS"; please use these directions to print the patterns out to the correct size.


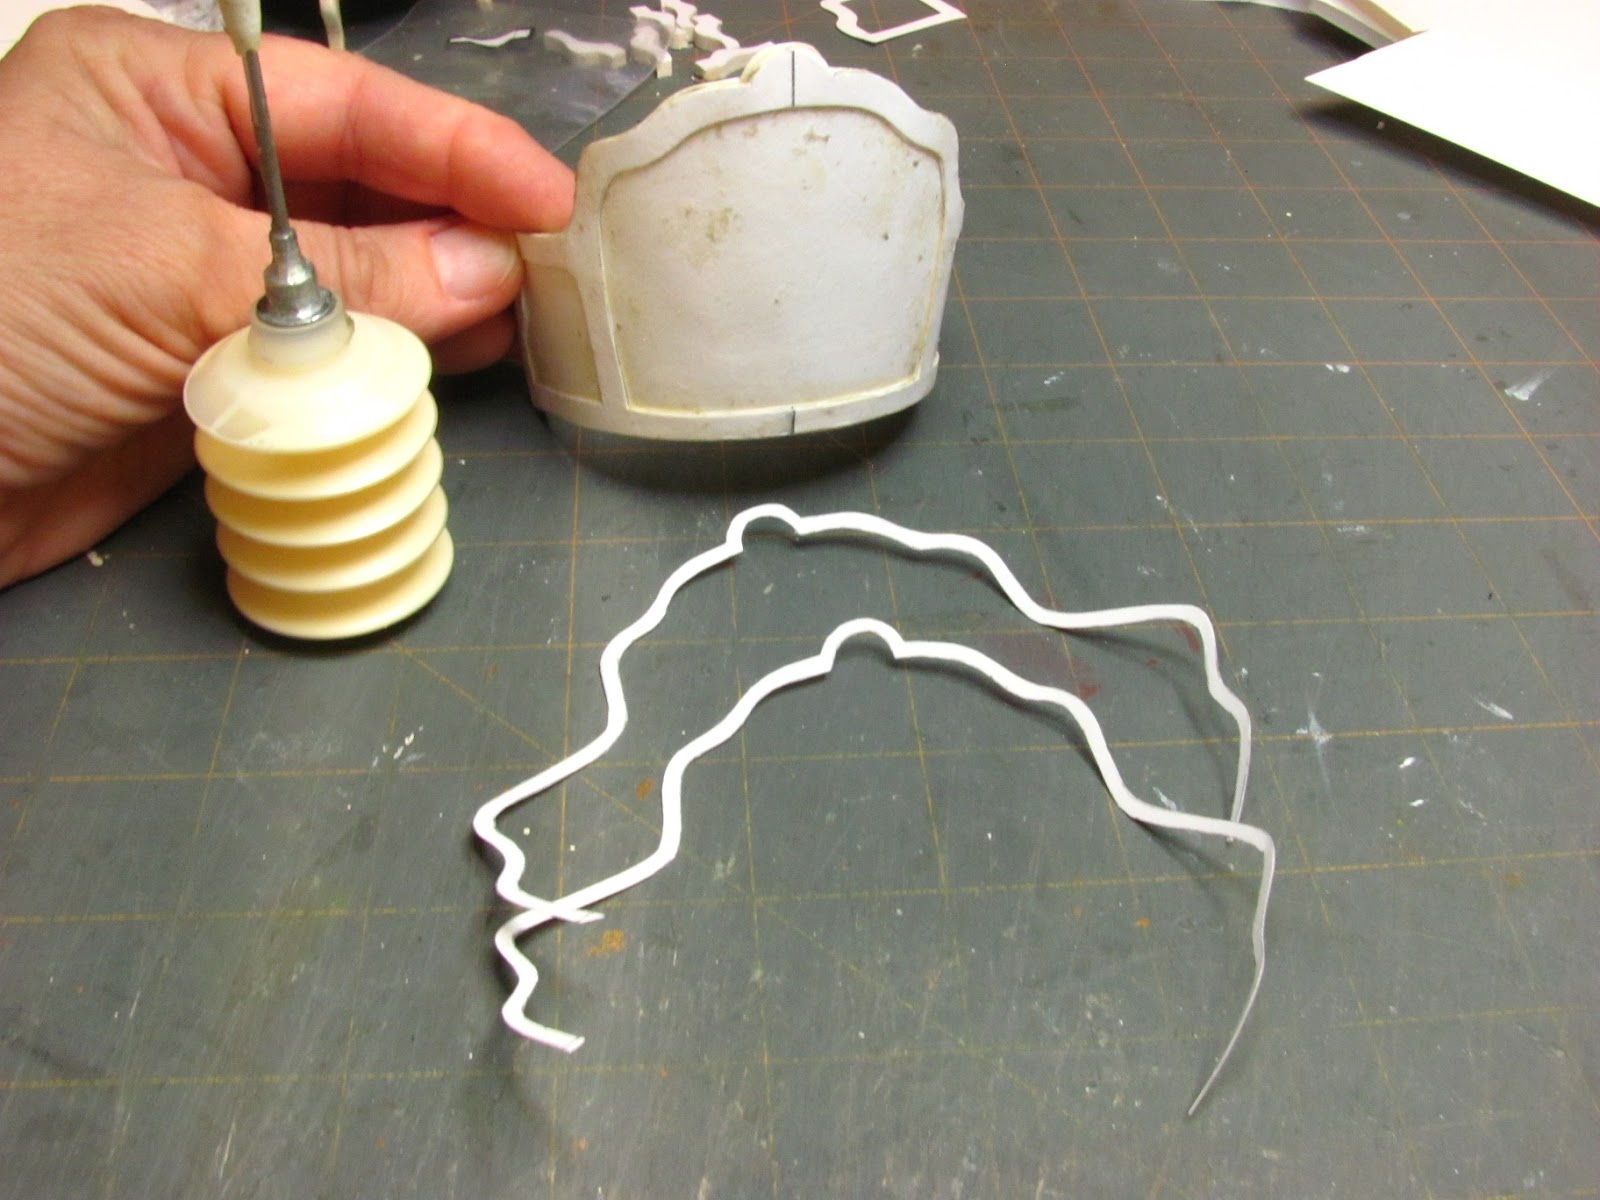
For a form for the back I used the top of a solid air freshener container.
(The other line you see is from my first attempt. The chaise was too small.)
I have been told that Renuzit has changed their packaging!!!!
Use the seat base as a guide to find something else for a form. The back has to fit around the seat base, look for something that fits in that space. You could also cut a form from foam core using the seat base pattern. I would probably cut 3 layers of foam core and glue them together for a form. Just use the part of the pattern that will be where the back is. You don't have to have the rest of the seat base.

Measure down from the small end 2 1/8 inches. Make marks all around and then fill in to make a solid line all around.

Cut out your back pattern and trace it onto a piece of card stock.

Mark a center line on the front.

Cut the back out, don't cut on the line this time. Leave extra card stock all around.
Spread wood glue on the back of your back.

Place the first back onto card stock and press all of the glue out. Cut these 2 backs out, again don't cut on the line, yet.

Spread glue on the back you just cut out and place it onto another piece of card stock.
Press all of the glue out and make sure you have all 3 layers glued together well.

Now, you cut the back out following the line.
Mark a center line on the back of the back, too.

With the glue still wet bend the back around the air freshener and secure with a rubber band or two.
(I like these rubber bands. I get them when I buy fresh broccoli.)
Leave this to dry. This piece needs to be stiff when we begin to work with it. If you do this first thing in the morning you should be able to work with it after lunch.

While the back is drying cut out your base pattern and trace it onto 1 layer of 3/16 inch thick foam core.
Mark a center line on the base.
Cut the base out.

Cut the back frame pattern out.
You can trace this onto card stock, 6 times or you can copy it using your computer printer. I ran out of ink so I traced mine 6 times.

Cut out the back frames.
Mark centers on one side of each frame.
Set these aside until the back is dry and stiff.
I know there are machines that scrap bookers use to cut shapes out. This pattern piece is a good candidate for this machine.

THIS IS OPTIONAL
I have traced the outside edge of the back frame onto card stock.

I am making marks all around the inside edge of the traced line. I am measuring 3/32 inch away from the outside line.

When I am done measuring and making the marks I fill in by drawing a solid line.
I am going to make two of these to add to the back of the chaise.
This will add more surface interest. I did not do this on the shabby chic chaise, I did it on the gold one. You can look at the pictures at the end of the blog to see what both styles look like.

In this picture I have glued, using wood glue, three pieces of mat board together and have it clamped to dry. This is for the legs, I am going to use my scroll saw to cut out the six legs. Six legs are an option, you may want to just use 4. If you scroll down you find a picture showing the unfinished chaise with 4 legs. I like 6 so I am using 6.
If you are using a craft knife you will need to trace the leg onto mat board 18 times, 12 times if you are using only 4 legs. I know, that's a lot of tracing. You could copy the leg pattern onto paper using the printer and glue the paper onto the mat board and then cut out the leg pieces. This will take time, but I think it's worth it. Take your time, take a break and come back to it.

I have the six legs traced.

I am about to cut out the legs and I thought I would show you my scroll saw.
These really make good Christmas presents. And . . . if you have one of these you could use 3/16 inch thick bass wood instead of 3 layers of mat board.

My legs are cut out. I want the glue to dry more on these because I will be sanding off the square edges later.
If you have your 18 legs cut out you now have to glue them together. Use wood glue and press them together tightly. Let them dry.
Wipe a little glue along the edges of the legs, too, this will help seal the paper.
Take a break and let the glue dry, it's best not to rush this process.

When the back is stiff take it off the form (top of air freshener container) and place it onto the base matching center lines. I know I don't have one drawn, but you do!
Straighten and shape the sides.

Use wood glue to glue the outside back frames on. I begin with gluing the center first.
Don't skimp on the glue, the glue will wet the card stock and let you ease the back frame into place, whether you have to stretch or move the frame around a bit. The outside of the back is getting bigger with every layer of card stock and all of the frames are cut the same size. This works for me so I don't make any changes to the size of the frames.
Be sure to press the card stock together tightly when you have the frame in place, this is important for the final look. Wipe the glue off the edges.
Keep a wet rag close and keep your fingers clean. Glue on the fingers will make the card stock back frame stick to you.

I have the 3 outside back frames glued onto the back of the back.

For the inside frames I found that if I cut the center bottom out it was easier to fit the frame into the back.
With every layer of card stock the inside is getter smaller so we will have to compress the frames a bit.

In this picture you can see that I haven't yet discovered that cutting out the center back helps a bit.
You may also have to cut the arm section because there will be too much frame to fit.

I've cut the card stock back frame.

I've cut the trimmed off the tiny bit of extra and glued the ends down. Continue gluing until you have all 3 frames on the inside of the back.
Don't forget to be pressing the edges together tightly.

Here are the OPTIONAL extra pieces that I am going to glue onto the top of the outside of the back.
I have cut the optional pieces out.

I've glued the optional pieces onto the outside of the back.

Here are all of the layers of card stock glued together with wood glue.
I hope you have tried to keep all of these edges neat and even.

This is the back ready to be glued onto the base.

The top of the center back has a little place that you could glue on some decoration. I am using a heart punch for mine.

I used 3 layers of card stock for the hearts.

Glue the back onto the base and hold with a rubber band.
Straighten and shape the arms.
Please let this dry before you go onto the next step.

This is a side view of the assembly.

When the glue in the legs is dry you can sand off the sharp edges using 180 grit paper.
If any paper starts to come off or come apart glue it back on or back together and set that leg aside and start to sand another leg.

This is the picture of the chaise with 4 legs.
When the glue has dried on the back and base you can glue the legs into the notches. DRY FIT THE LEGS AND TRIM THE NOTCHES IF NEEDED.

If you want 6 legs you will have to cut 2 more notches in the base.

Cut the notches, dry fit the legs and if they fit glue them in.

I like the chaise with 6 legs.
Just a note here, but you could cut off the front of the base and make a chair out of this pattern, also.

This is the front of the shabby chic chaise.
First, I cut strips of card stock the thickness of the base and glued this on the base to cover the foam core.
Next, I punched out a heart for the center and cut a narrow strip of card stock to fit all around the base of the chaise.

For the gold chaise I am going to add a half circle at the center front of the chaise.
I used my circle template to draw the half circle.
The strip of card stock is the thickness of the foam core.

I glued on the strip of card stock to cover the foam core edge. This card stock strip goes all the way around the chaise. You will probably have to use a couple of pieces get the length you need.

I've cut another strip of card stock to be glued along the bottom of the first strip. I've also added a heart in the center.

Measure the thickness of the back and cut a strip of card stock that measurement.

Glue the strip to the edge of the back to cover the layers of card stock.

You've just built a French chaise. You probably feel like lying on one now!
I spray the chaise with a clear varnish, I use Krylon satin. Give the chaise a couple of coats, letting the coats dry between. I concentrate on the legs, don't go and get them drippy, just make sure they are well covered.
After the varnish is dry I sanded the legs with 220 grit paper. I also sanded anywhere else that I thought needed smoothing such as seams,wrinkles and edges I wanted to take the sharp edge off of. You can add a little glue to the seams to fill in, spray and sand.
If you think you need another coat or two and more sanding you can do that. You need a smooth surface to start the painting process. Take your time here and look closely.
Some of you might be looking around my room and wondering what that is under the window that's covered up with the yellow checkered tablecloth. That's my Passap knitting machine. I used to be quite a machine knitter. I wrote for a magazine for 6 years and authored 2 books. I don't use it much anymore, I love doing miniatures just tooooo much. I mention this because of the little afghan on the shabby chic chaise. I knit the afghans on that knitting machine.

Tigger has joined us for a bit. Her brother, Digger, has been on the blog before.
I painted the chaise gold. You could just as easily spray the whole thing gold, too.

I sanded and painted a few times to get a smooth finish. Again, take your time and give it all a good look before you go on.
Check out February 15, 2010, "How to make 2 fancy faux finishes", for another way to finish in gold.
When I was satisfied with the surface I sprayed the chaise with the Krylon satin to finish.

For this chaise I painted on a little brown paint to dull the gold a bit. For the shabby chic chaise I used the same brown but added a little glaze so I could wipe it off. I found that the spray varnish kept the paint from sticking, too. This is all an experiment. When you are done spray the chaise with the varnish again.
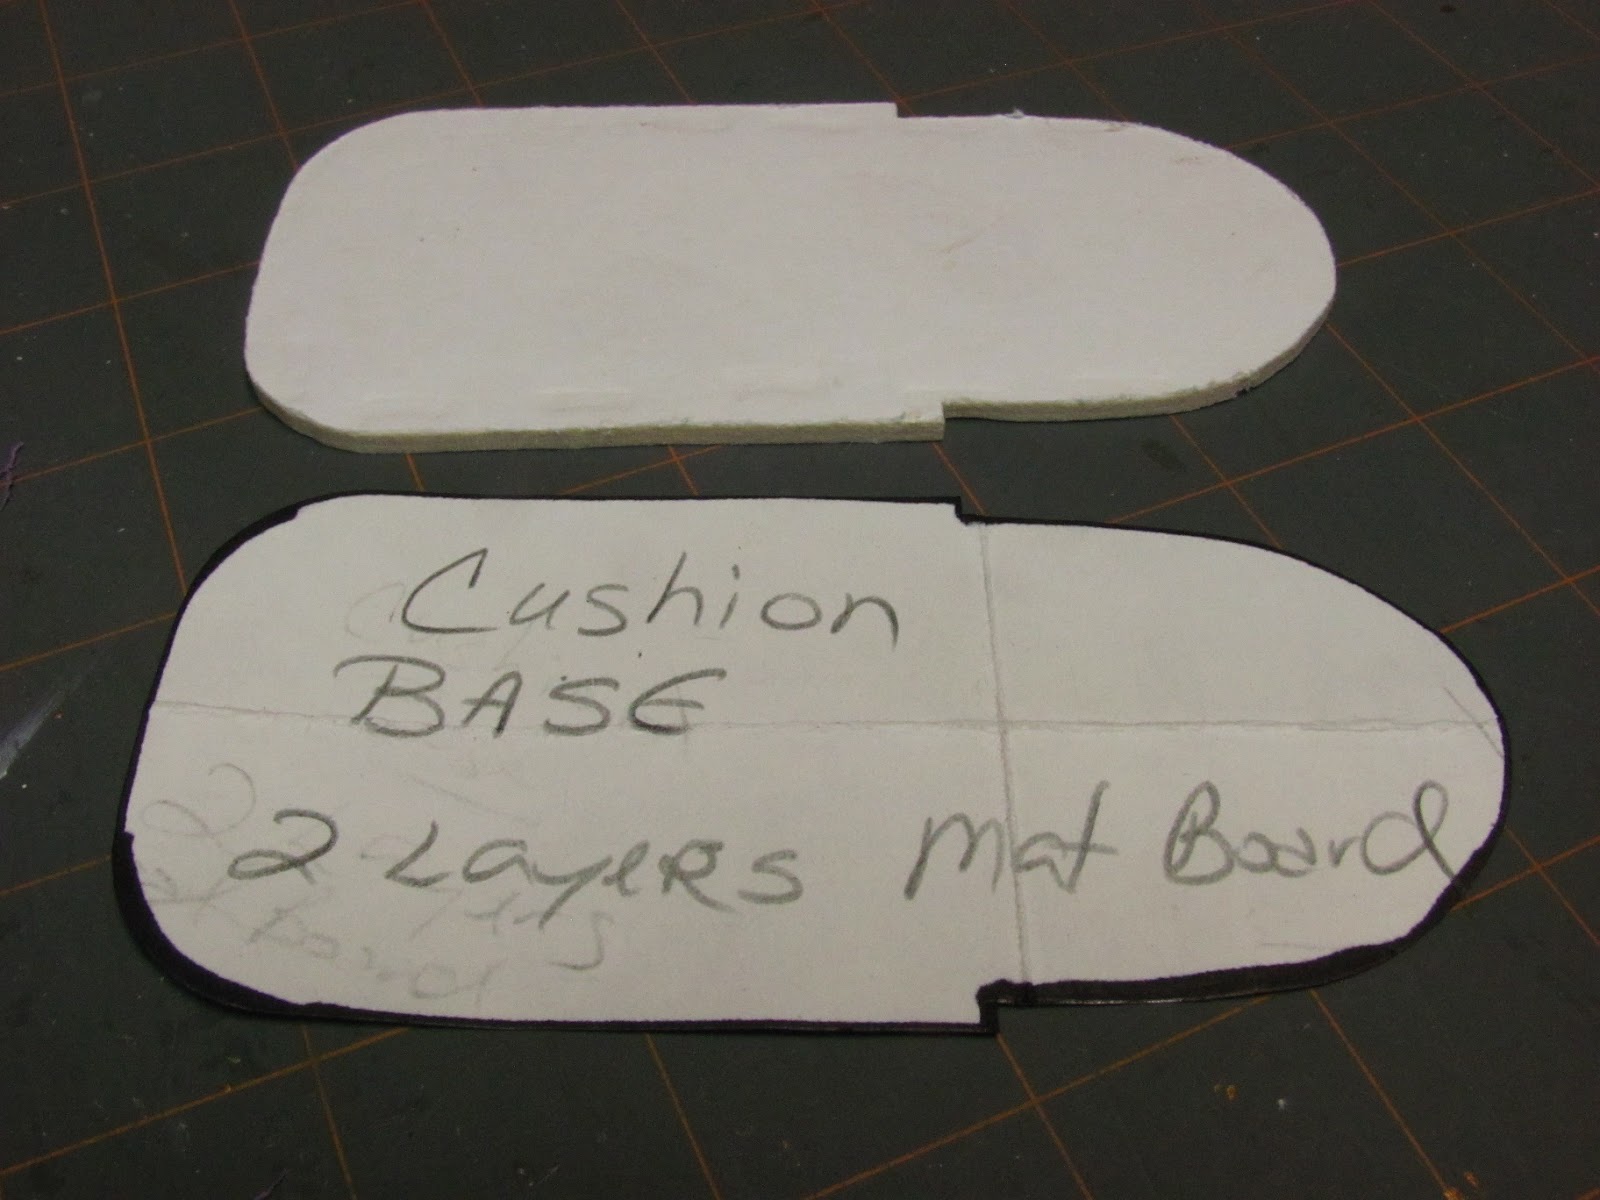
Use your cushion base pattern to trace onto 2 pieces of mat board the cushion base.
Glue the 2 layers together and let dry. You may want to clamp them together.
If you have a scroll saw glue the mat board together first then cut out the pattern.

Cut a strip of Thermolam Plus, I talked about this in the "Make and upholster a 1 inch scale chair" tutorial. I buy it at JoAnn's, I have found it in the fabric department at Wal-Mart,too.

Glue the Thermolam Plus onto the edge of the cushion base, only in the "leg" area, not past the notched area that is the seat. Trim off the extra even with the mat board.

I am using a "pain in the neck fabric". It will get glue spots, it will be hard to glue and it will be hard to ease around corners, but I thought it would look good with the gold and it was a remnant for only a $1.00.
Cut a strip of your fabric and cut some notches to help you get around the end of the chaise.

We will be using tacky glue for the upholstery.
Glue the fabric onto the cushion base. There should be a little extra fabric past the notches into the seat area.

Cut more notches on the other side of the strip of fabric and glue it down to the cushion base.
Trim off extra fabric in the seating area and glue the ends down leaving little "ears" of fabric. I apply glue inside these "ears" of fabric.

I trim off the "ears".

Glue the cushion base into the chaise. I have it clamped.

Use the back frame pattern to make the pieces needed to apply fabric onto for the outside and inside upholstery.

You are going to make the pieces for the inside back just like you made the back using 3 layers of card stock glued together.
Trace the pattern, rough cut out and glue onto a second layer of card stock, rough cut out and glue onto the third layer of card stock. Following the lines of the pattern cut the 3 layers out.

Cut the center back out and place it onto the form and secure with a rubber band. Let this dry.
Cut the side pieces out and set them aside for now.

Trace the pattern again for the outside pieces and cut them out. You will only need one layer of card stock for these.

You will need to fit and trim these pieces to allow for fabric and trim. I left at least a 1/16 inch all around.

I am showing the arm piece.

For gluing fabric onto card stock I use glue stick.
Don't use too much on fabric that shows glue spots, this will show, too.

Apply the glue stick to the card stock and press the card stock onto the fabric.
Cut notches all around.
Use the tacky glue to glue the extra fabric to the back of the card stock.

Glue the center back piece onto the outside of the back.
The trim will fill in the extra space.

This is the piece for the arm, glued to the card stock with notches cut.
Use tacky glue to glue the extra fabric to the back of the card stock.
Glue onto the side of the chaise.

When the inside pieces are dry enough to work with you will have to trim them to fit. Leave at least a 1/16 inch all around.

I've left a 1/16 inch all around.
Trim the pieces for the arms, too.

Cut out the pattern for the center back Thermolam Plus pattern.
Use it to cut the first layer, cut the second layer a little larger.

Spread tacky glue all over the card stock piece and press the first layer, second layer and finally another piece that covers the whole center back. Trim off the extra Thermolam Plus even the edge.
A Note: December 16, 2011, "How to make a no-sew mattress and box spring", this shows how to tuft and you might want to apply this to the center back of the chaise.

Cut a piece of fabric larger than the center back. Cut notches in the extra fabric.
I start by gluing the bottom onto the back of the card stock.

Glue the rest of the fabric around the back, easing it in, smoothing out the folds.

Glue the center back into the back of the chaise.

I only use 2 layers of Thermolam Plus for the arms. I start with a small square in the center.

Spread tacky glue all over the arm and press the small square on first then press another piece to fit the whole arm.
Trim off the extra Thermolam Plus even with the edge of the card stock.

Cover the arm piece just like you did the center back and glue the arms into the chaise.

Cut out the seat cushion pattern and DRY FIT into the chaise.
Make adjustments if needed to the pattern before you use it to cut out the foam core.
Trace the seat cushion pattern onto 1 layer of foam core and cut out.

Dry fit the seat cushion into the chaise. Make adjustments if needed.

I use 4 layers of Thermolam Plus for the seat cushion.
On the pattern you will see a line drawn on half the pattern. This line is for the first layer, you will have to make a pattern for the first layer. The pattern I gave you is for the second layer.
Cut out the first 2 layers of Thermolam Plus.

Spread tacky glue all over the seat cushion foam core and press the first layer on, the second layer and a third layer that covers all of the seat cushion.

Trim the extra Thermolam Plus even with the edge of the foam core.

The fourth and final layer will be glued under the foam core in the leg area and at the back. This fourth layer is not glued on the seat's side.

Cut notches around the end of the cushion.

Glue the Thermolam Plus onto the form core.
Notch the back of the Thermolam Plus.

Glue the Thermolam Plus onto the foam core at the back.
I do apologize for using the name of this stuff so often, but if I switch to using a substitute like "fleece", that could be mistaken for many different things.

Here is the seat cushion ready to be covered with fabric.

Cut fabric to fit the cushion with extra to be glued around and under.
Cut slashes into the notches at the end of the seating area.
Do you see the traces of red fabric on the end of the seat cushion? Got it all covered and what did I find? A glue spot! Had to rip it off. Keep a wet cloth next to you, wipe your hands. There is always stray glue lurking at the side of a finger nail to ruin your upholstery.

I began covering the seat cushion by gluing the leg sides to the foam core.

To keep me from pulling the fabric down to the bottom when I begin gluing the bottom, I glued a small bit of the back to the form core.
You naturally pull the fabric when you are gluing around the curve, gluing the fabric to the back will stop that.

Start gluing the end. This fabric isn't cooperating and I am going to leave it for now and come back when I have everything else glued. Maybe I can get the folds out.
I wish I had you all here.
Especially, when gluing around curves you want to keep pulling the fabric down. All you are doing is adding more bulk, creating more folds. The best corners are the ones where the least amount of fabric is used. When I come back I will cut out some more of the fabric. For right now I want the fabric to set up with the glue.

Apply tacky glue to the notch and press the fabric down to it.
Apply tacky glue in the "ears" and press the fabric together.

Another view.

I've got both of the "ears" glued and I am now putting glue onto the fabric at the corner of the back. I also will apply tacky glue to the side.

There's the glue.

I've pressed the fabric together and glued the sides.
I then trimmed the fabric out of the corner.

I'm adding a little more glue to the notched area "ears".

I've trimmed out the fabric. If you have fabric that doesn't ravel you can trim the "ears" off flat, even with the foam core. My fabric ravels.
Can you see at the corner back where I've glued the corners down?

I've gone back to mess with the end. This will have to do and I will hope the trim will cover most of the folds.
You might ask, "Why didn't you cut a strip of fabric for boxing?" I tried, but my fabric ravels and I would have to glue the edge to stop that. Oh, my fabric hates glue, too. Turning a hem would make the boxing out of scale. Keep out of the remnants, Kris.

I HAVEN'T glued the seat cushion in, yet. It's just setting there.

I am going to make twisted embroidery floss trim. I don't know if you all know how to do this, but I am going to explain it anyway.
For the picture I have the six strand floss taped to my table and I am twisting it. How much? This you will have to experiment with. You can use the six strands or use less strands.

With your other hand hold the floss in the middle and fold the end you are twisting back to the taped end. The floss will naturally twist the opposite direction and hold the twist.

This little drill is available from Hobby Builders. I bent a nail and put it in the end so I could tie on the floss. I tie the other end of the floss to a hook I have screwed into my cabinets near my table. This is what I use to twist the floss with.
This takes experimentation to get used to how much to twist but I am sure you will get on to it.

The folded middle sometimes isn't usable. You have to glue the floss before you cut or it will unwind.

This can be heart break time, keep your fingers clean, wipe them off. You'll be pressing the trim on and get a little extra glue on the side of a finger, then you'll pick up your chaise to turn it around and you will have left glue behind. Oh, you probably won't know right then but you'll find it. . . . .
Start gluing the floss on. I have a tutorial on piping if you want to make piping for your chaise, April 14, 2010, "How to make piping for pillows". I also have a tutorial for pillow with a ruffle, March 17,2011, "How to make a dollhouse pillow with ruffle".

The floss is glued on the inside and outside of the chaise.

I glue the floss or piping onto my seat cushions before I glue the cushions into my furniture.
I have glued the floss onto the seat cushion and have glued the seat cushion into the chaise.

There they are.
It took me about 2 days to complete a chaise. I was an intense 2 days, lots of gluing! I hope you try this out. Even when I look at the piece it blows my mind that it's only paper.
As always,
Have fun, Expand on it, make it better . . . . . .
Just Keep Making Minis!
TTUL Kris
IF YOU HAVE QUESTIONS PLEASE E-MAIL ME AT
CAMCEILING@FRONTIERNET.NET