

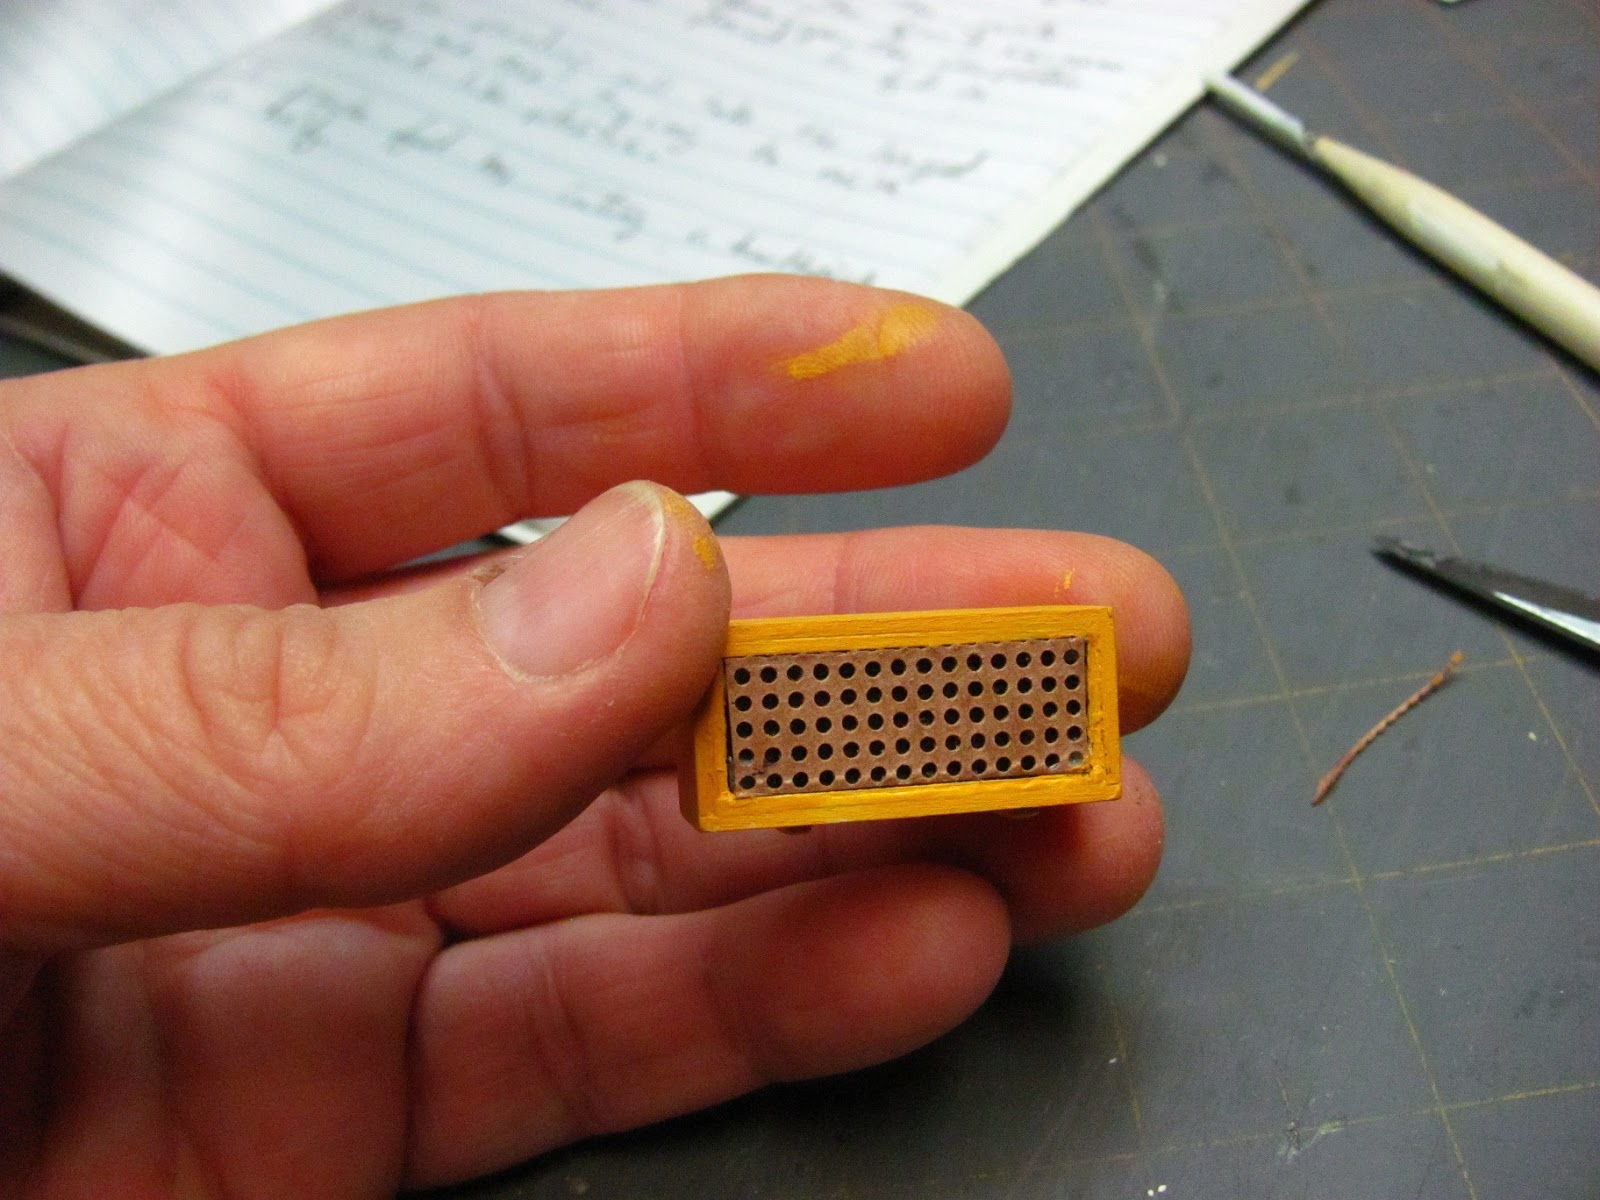
This is the radio from the "First Apartment" room box.
I've posted pictures of that room box right before this post, click at the bottom of this post at "older posts" or go to the list at the left to Pictures of Room Boxes.

I am copying it from an S and H Green Stamps catalog. I found 1958,1959 and 1960 catalogs at a flea market. These are good for household things. They give good descriptions of the items.

I especially like that they give the measurements. On K, the model I am going to make, they didn't give the depth. I looked for the depth of the white radio and it was listed.

When I am copying something the first thing I do is to write down the conversion table. I've been making miniatures for over 15 years and I still have to write it down.

This is my composition book that I write it all down in.
I've converted the full-size measurements to 1 inch scale.


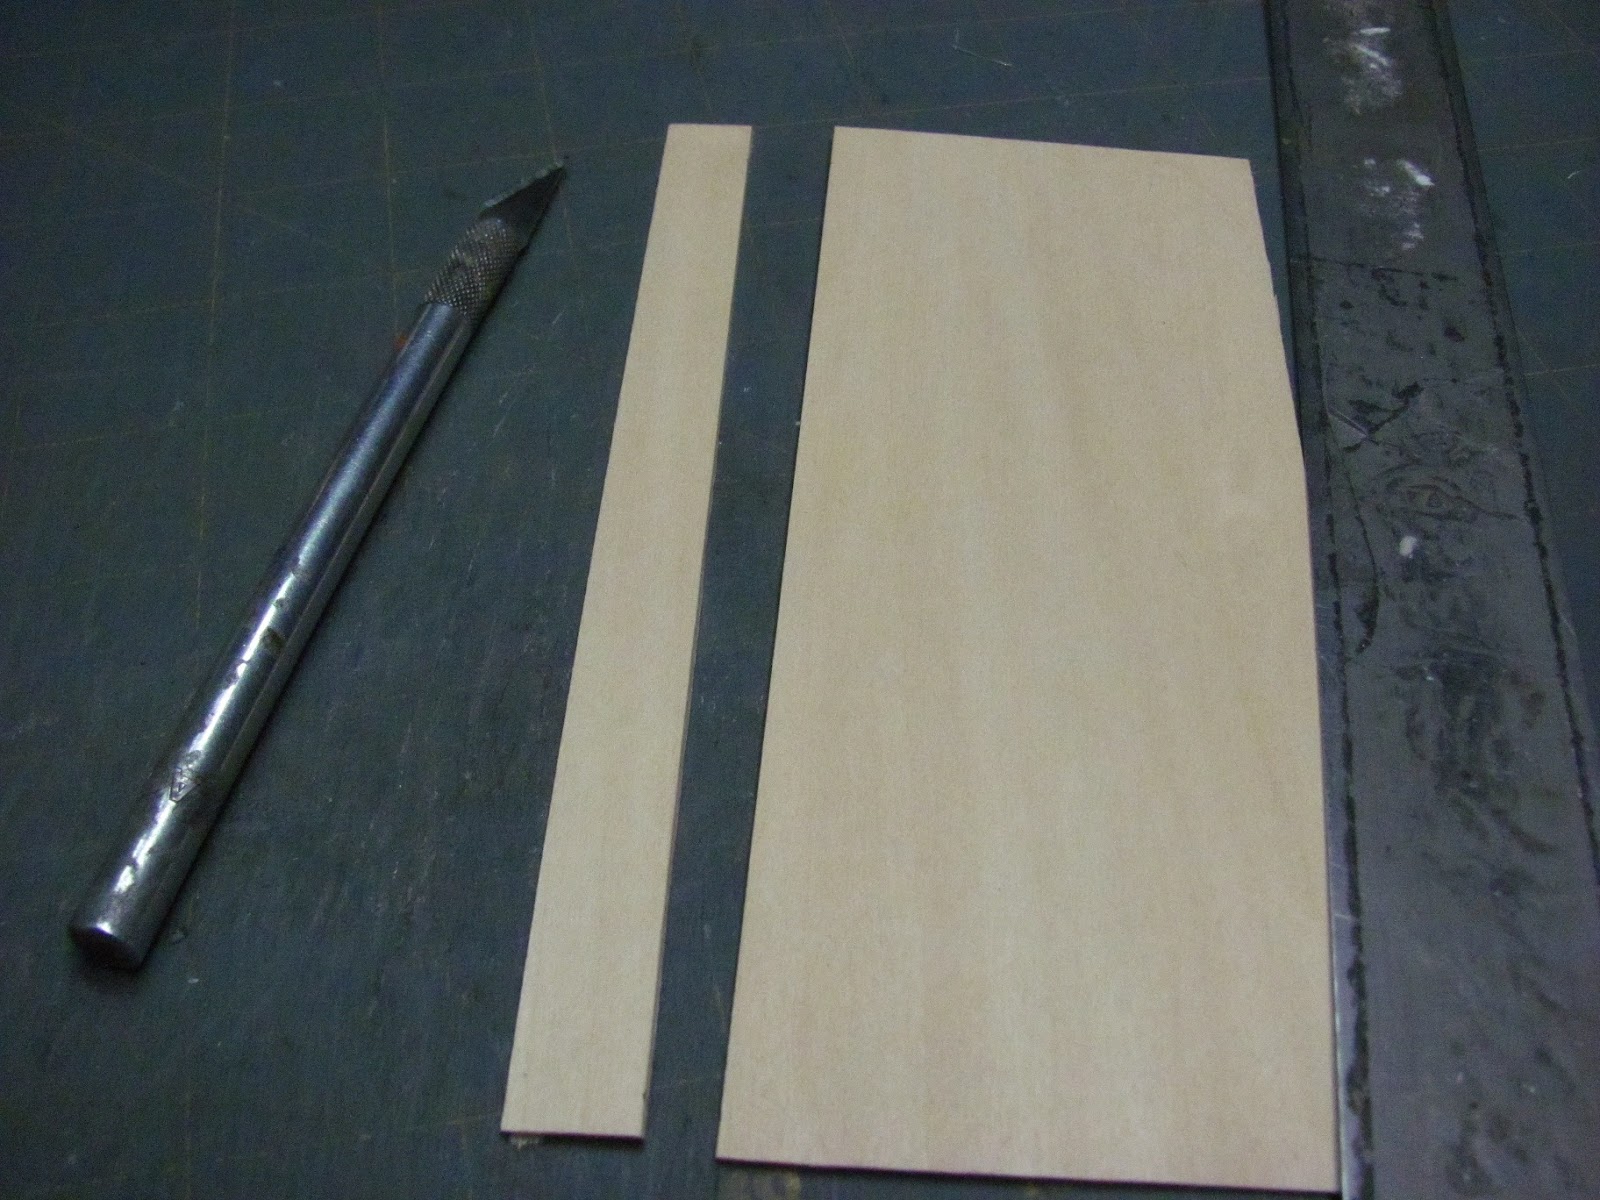
For this project we are going to use basswood, 1/32" thick. You can cut this with your craft knife.
While you are there pick up a piece of perforated cross stitch paper. I use that for the speaker part in between the clock dial and the channel dial. You can also pierce your own on card stock. I am not good at that, so I use the perforated cross stitch paper.

For the base of the clock/radio we will use our old stand by, mat board.
Cut a couple of strips of mat board, 13/32" (that's the 32nd past the 3/8" mark) wide.
Cut these strips into pieces 15/16" long. You should cut 7.

We are using carpenter's wood glue. I had to buy a new bottle, the lid on my TiteBond bottle broke and I couldn't refill from my husband's gallon bottle anymore. The store I went to had Elmer's, just as good.

Glue the 7 pieces together. Try to keep everything square. I am using my square to butt to.

Try as hard as I can, I can not cut every one of the pieces the same. I will trim, carefully, to keep everything square.

I've trimmed off the long ones.
Cut off about 4 inches of basswood from your big piece. I have a scrap that I am using.
Now, cut a strip that is 1/2 inch wide.

Measure 1/16" from one long side and draw a line.
When we glue the wood to the mat board base the line is where the base should be glued to.

Using the low beam square, (from Micro Mark) I will cut the sides first.
Measure the base's height, should be 3/8", but you use your measurement. Cut 2 pieces that height.

Match up the line to the base, there should be more over hang on one side than the other. The side that has the most, the 1/16," is the front. The back has just enough for a piece of card stock or the perforated cross stitch paper.

Measure the length of the base with the newly glued basswood on it.
O.K., O.K., mine is measuring longer, I've adjusted the measurements, you should be 1 inch long.
That's why I ask you to measure.
Cut 2 strips the length of your base.

Glue these 2 strips to the top and bottom of the base.
To even things up use sand paper, use 220 grit or finer. Things can get uneven really quickly, be careful.

Cut a piece of card stock to fit into the front of the base.

Glue the card stock into the front of the base.

Cut another strip of basswood, this one 7/16" wide.

Measure the height of the base and cut 2 pieces for the sides. Mine measured 7/16". Dry fit, don't glue on.
With the 2 pieces being held onto the sides, measure the length of the base, you should be near the 1-1/8" mark on your ruler. Cut 2 pieces for the top and bottom. Dry fit, don't glue on. I couldn't take a picture and hold the ruler and the sides all at the same time.
To get the painting started I would paint the base now, just the outside for now. I painted mine an off-white. I would also get started with the outside pieces, too. I did the original in avocado, this time I am using harvest gold. Paint on both sides of the outside pieces, they will warp if you don't. Be sure to paint at least one long side, that's going to show to the front of the clock/radio.
While the paint is drying, and that's just so hard to wait for, we will hunt for a clock face and a barometer face. BAROMETER face? Yes, that's what I used for the channel dial, looks kind of like a channel dial.
For the original I had a catalog to cut from, I like nice shiny catalog pictures, I don't have one now. I went to www.klockit.com , that's the catalog I had. When the home page came up I left clicked on "clock inserts". I chose "white 2 3/4" (70mm) fit ups", I left clicked on "view details". I then right clicked on the image that came up. I left clicked the "copy image" option. I then moved the cursor to the Windows start button, that's in my bottom left corner, I left clicked and chose Paint. When the Paint program came up I left clicked on the "paste" button and my faces came up on the screen. I saved them. I then adjusted the size to fit my clock/radio. I know most of you out there know how to do what I just explained, but I thought I would explain it that way so if you wanted the same faces you would know where and how I got them.
After I got the faces to the size I needed I printed them out. I put the paper back into the printer and printed the faces again, over the originals, this makes them darker and brighter. I sprayed the images with clear finish when I was done with the printing.

Why do some pictures do this? I can not get it turned the other way.
Using my circle template I figure I want my clock and channel dials to be 5/16" diameter.
That's what I printed them out to be, after a few that that weren't!

Here are my faces. I am dry fitting them.
I want to divide the front into 3 sections. Mark on the front where the edges of the faces are.

I've got lines drawn, you do the same.

Cut a sliver of basswood, less than a 1/16". We are going to cut this into 2 pieces and glue them onto the lines you drew on the front.

Remove the faces from the front.
Measure and cut 2 pieces from the sliver of wood you just cut.

I've glued the slivers in and I am DRY FITTING the faces again to make sure everything looks fine.

I have painted the inside of the front. I have painted the middle section black, dark grey. When the perforated cross stitch paper is glued in the dark color will accentuate the perforations.
Add a little glue, the carpenter's glue will be fine to use, to your paint to fill in the seams and edges of the wood.

This is one of the pieces for the outside. I am painting it harvest gold. I added a little burnt sienna to yellow.

For the knobs I dipped a couple of straight pins into glue and a little black paint. Let them dry.

I painted and sanded my base and outside pieces at least 4 times to get everything smooth.
When you are happy with your surfaces glue the outside pieces onto the base. Glue the sides first.
Now, you have more seams and edges to cover up. Sand everything even. Use a little glue in your paint to help cover the seams and the edges of the wood on the sides. Sand to smooth the surfaces out.

While you are waiting for the paint to dry you can make the feet for the clock/radio.
I used toothpicks for this. Slice down the middle of the end of the toothpick.

Measure for length and glue onto the bottom of the clock/radio. I used the taper of the end of the toothpick to make the clock/radio have a slight tip to the back, the front is higher.

This is the perforated cross stitch paper, I found it in an 8.5 x 11 sheet. Also makes good peg board for miniature scenes. I used it in the "First Apartment" for the cabinet doors on the bookcase/cabinet by the sofa.

This is the back of the clock/radio. Measure it for a piece of the perforated paper.

Paint the back black.
Glue a piece of the perforated paper into the back of the clock/radio.

Glue the faces onto the front.
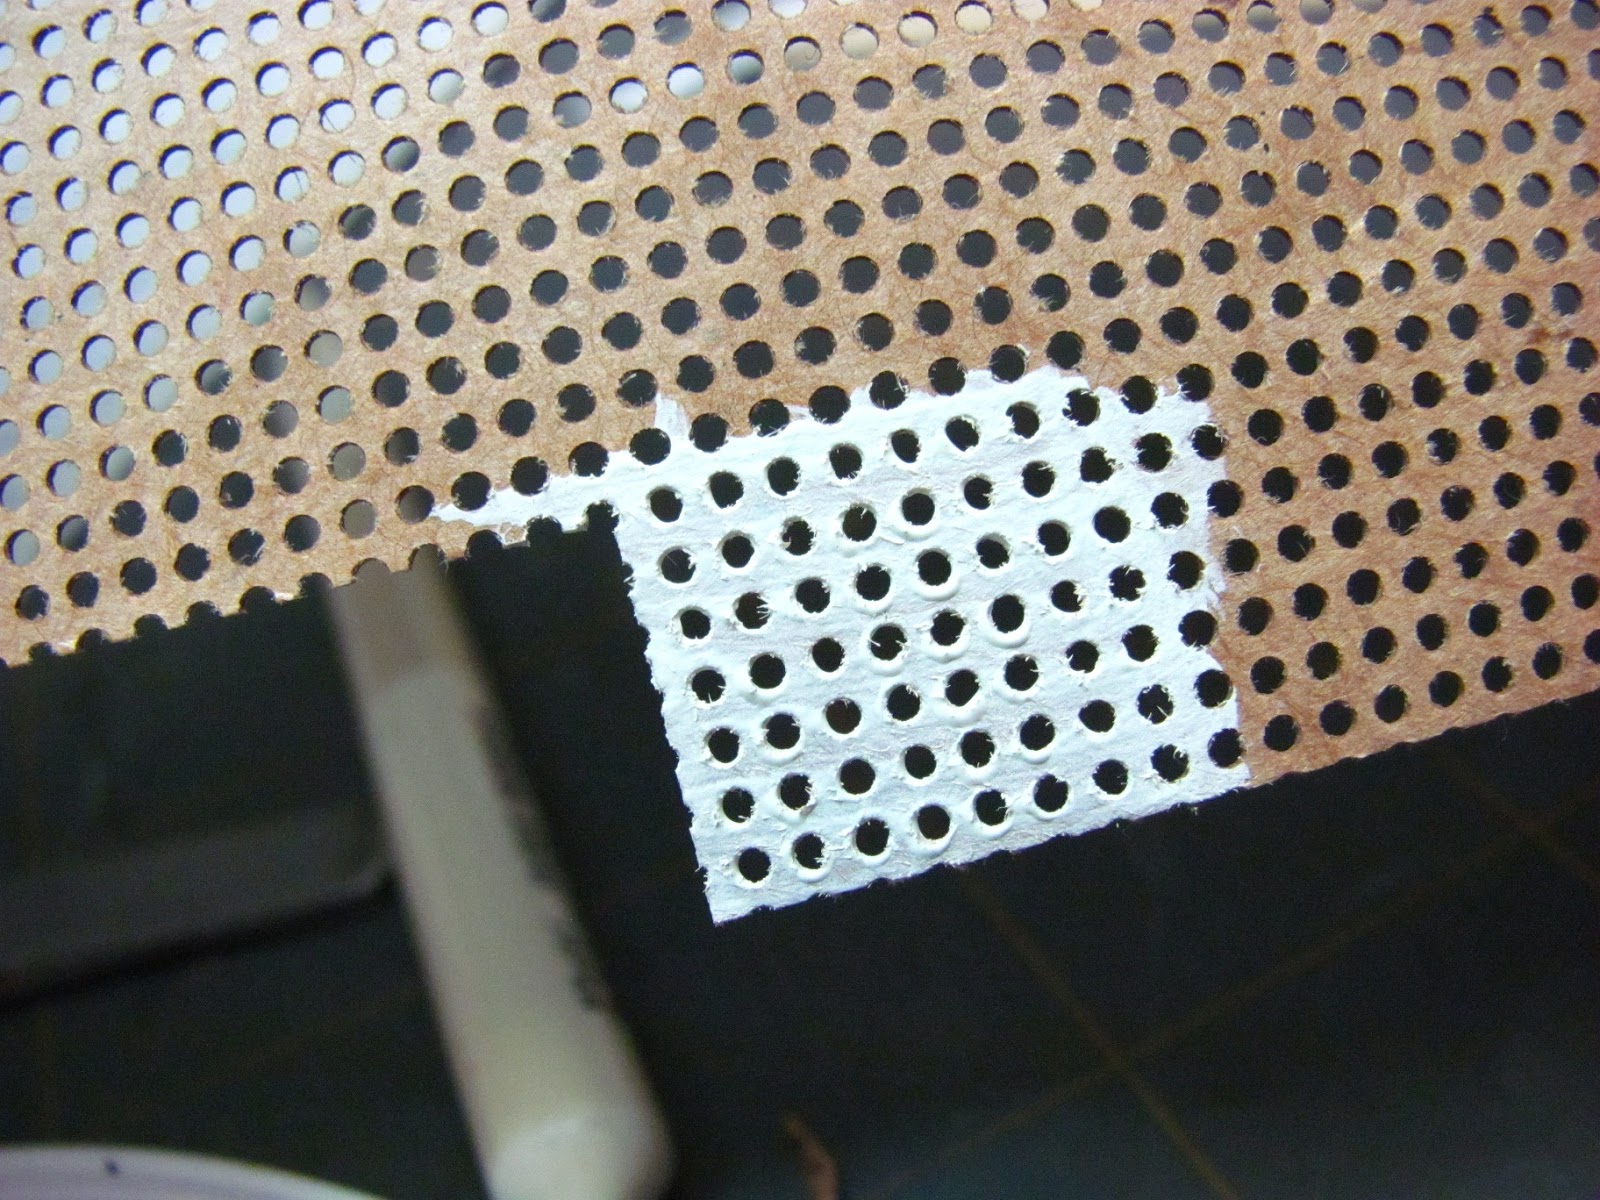
Paint a little bit of the perforated paper the same color as the base.

Apply a little acrylic finish on the knobs.

You can start applying finish to the whole clock/radio. I did apply 3 to 4 coats of finish and sanded between coats to get a "plastic" like finish. Only did this on the outside, I didn't do that to the inside where the faces are.

I applied a coat of acrylic finish to one side of the perforated paper.

I've cut a piece of the perforated paper to fit inside the middle section. To fill in any gaps there may be use a paint and glue mixture.
After this is dry you will want to apply another coat of acrylic finish to the front.

I've got a couple of coats of acrylic finish on the clock/radio.

I save clear plastic packaging. You never know when you might need some.

Measure and mark to cut out little windows for the clock and channel dials. I made a mark on the plastic with my craft knife and trimmed with scissors. I did not glue these in, you can just stick them in the openings, if they are tight, they will stay put.

I've got the windows in and I've drilled holes for my straight pin knobs.
This was fun to do again. This is the kind of stuff I did all of the time for my room boxes. I love making the minis myself. Hunting for just the right thing to copy and then figuring out how to go about. Ah . . . . when I get the orders done I will be able to "play" again.
I hope this gets your creative juices flowing!!
Have fun, Expand on it, Make it better . . . . . .
Just Keep Making Minis!
Happy Thanksgiving!! Kris