

You might not want mat board furniture in your finest dollhouse, but painted mat board furniture is certainly fine for small projects and gift projects. Painted mat board furniture makes fine rustic country cabinets but don't leave out a more delicate look for the shabby chic touch.
To make this cabinet easier to make for first timers I've not shown how to make the drawer open or bottom doors open. I am not an advocate of leaving the drawers and doors open to show what's inside anyway. They aren't left open in my real house so I am not going to leave them open in my miniature scenes. I am sorry if that doesn't agree with some miniaturists. I've made the dresser deep so that the top can be loaded and of course you can load the shelves.
I have experimented with 2 colorways, light base coat with a dark top coat and a dark base coat with a light top coat.

To experiment cut a strip of mat board and spray with a matte finish. I use KRYLON brand spray finish. Apply 2 coats of your base color, dry between coats. Let dry and sand with 320 grit sand paper. Apply one more coat of your base color and let this dry.
Apply one coat of your top color, leave brush strokes, light and dark areas. Let this dry.
This picture is showing the top color on both colorways. Notice the uneven color.

Using 320 grit sand paper sand the top color make you base color show. I use circular motions to do this.
Use a rock with lots of different points to dent the surface of the mat board.

Brush the stain on, be sure to get into the dents. Leave it set about 30 to 60 seconds, depending on how heavy you brushed it on. Gently wipe off, leaving what you want behind.

To finish I use a piece of brown paper grocery bag that's been crumpled to soften it. I rub the paper on the surface to burnish to a nice patina.

This picture shows the two colorways.
The left has the light top coat and the right has the dark top coat.
Start by making the base cabinet. I have included the centimeter measurements. I do this by drawing a line the length I want in inches and measuring it with centimeters for the transfer. This project depends on the measurements more than the previous projects. I would do some double checking just to be sure.
Cut from mat board: sides - cut 2 at 1 5/8" (41mm) x 2 1/2" (63mm)
back - cut 1 at 2 1/2" (63mm) x 2 1/2" (63mm)
bottom and top - cut each at 2 1/2" (63mm) x 1 9/16" (39mm)
front - cut 1 at 2 5/8" (67mm) x 2 1/2 (63mm)
I must discuss "dry fitting" at this point. It's very important to dry fit, fit the pieces without glue first. This is to check on the fit and if adjustments need to be made.

I drew an arch shape at the bottom of the sides. This lightens the look of the finished cabinet. I used a craft knife to cut the arch out.

Glue the sides to the outside edge of the back using yellow glue. Yellow glue is also called carpenter's glue, wood glue, Elmer's Carpenter Glue, or Titebond.

Glue the bottom in along the drawn line.
Glue the top into the base cabinet.

Use my pattern or make one of your own design for the front bottom. Cut this out with your craft knife.


Glue the front onto the base.

The first piece is cut 2 11/16" (68mm) x1 3/4" (44mm).
The second piece is cut 2 13/16" (71mm) x 1 13/16" (46mm).
Use 320 grit sand paper to sand one long side and the 2 short sides half round. Sand both pieces this way.
Glue these two pieces together with the flat backs even.

Glue the decorative top onto the top of the base cabinet.

The drawer front is cut 2 1/4" (57mm) x 1/2" (12mm).
Sand all four edges half round.
Do not glue onto the front of the cabinet, yet.
Set the drawer front aside for now.

Measure and draw lines 1/8" (3mm) in from all sides. At the top you can draw an arch to make the door more interesting.
Use 320 grit sand paper to sand all four edges half round.

Use a sharp blade to cut the centers out.
Set the drawer front and doors onto the face of the base cabinet. Center everything, leaving a bit of space between the cabinet doors.

Carefully trace a line around the inside of the doors onto the base cabinet front.

Use one slice with your craft knife and a steel straight edge to score lines in these shapes you've just drawn. You can make them random widths or measure to make the lines evenly apart.
Use a small stylus to widen out the lines (or a ballpoint pen that's run out of ink).
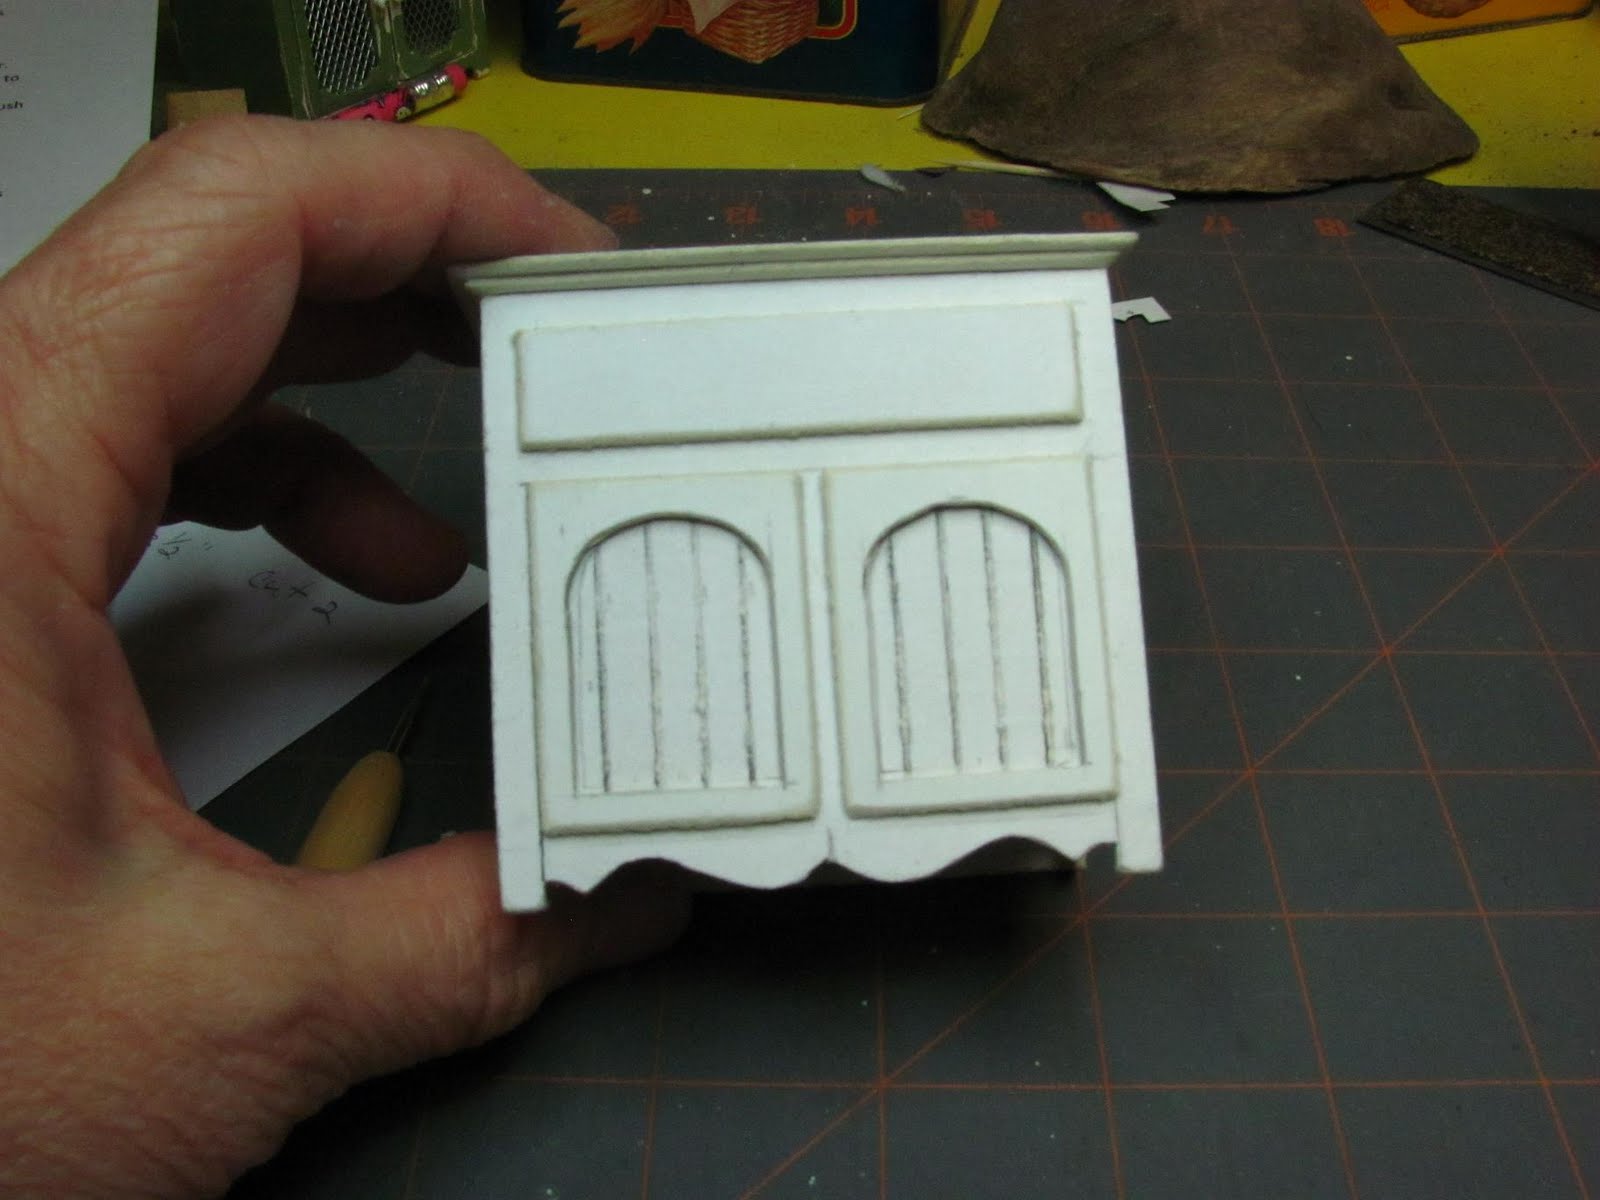
The drawer front and doors aren't glued on yet. Set them aside for now.
Looking good, so far.

Cut a back - 2 1/2" (63mm) x 2 3/4" (70mm); 2 sides - 2 3/4" (70mm) x 3/4" (19mm); 2 shelves and a top - 2 1/2" (63mm) x 11/16" (17mm); face frame, 2 pieces - 2 3/4" (70mm) x 3 1/16" (4mm) and the piece you will cut the shaped top apron from - 2 1/8" (54mm) x 15/16" (9mm).
You will also need to cut 2 pieces for the decorative top - 2 3/4" (70mm) x 7/8" (22mm) and 2 7/8" (73mm) x 15/16" (24mm).

Copy and paste this pattern as you did the bottom apron.
If you notice in the picture above I have lines on the back. I wanted the back of the cabinet to have some surface interest so I measured 3/16" (4mm) between lines and used one slice of my craft knife and a small stylus to make grooves in the back.
I have built so many cabinets wishing I had waited to put the finish on and then glue the shelving together. It's very hard to get a good looking finish with the shelving in the cabinet. Since we are focusing here on an aged finish we might as well try to do a nice job.

Let dry.
I am going to use Delta's Wedgewood Green as my base coat. Apply 2 coats, drying between coats. While the paint is still wet use a stylus to clean out the grooves you made on the front of the base cabinet and the back of the upper shelving unit. Just take the extra paint out.
*A tip on painting, keep your fingers clean and dry. Wipe them frequently. Paint on your fingers will stick to the paint on the mat board causing surface blemishes.
Let these 2 coats dry thoroughly. Remember, we are working with paper and now it's damp.

Sand using 320 grit paper.
Paint the third coat of the base color onto everything and let it dry.

If you are timid, start on the back of the base cabinet to get the "feel" of it.

Use 320 grit sand paper to sand the top color. Use a circular motion and a light touch. Keep in mind the natural wear areas.

I used a rock with lots of uneven surface to dent the surface of the mat board.
Just a few dents on the few pieces.

Use Minwax Water Based Stain, I used walnut. Brush onto the surface. Do one piece at a time. I left it on about 30 to 60 seconds, no more. Wipe the stain off leaving what you want behind. Make sure you leave some in the dents.

To finish I used a piece of crumpled brown paper bag. Crumple it up to soften it. Burnish the surface of all pieces.

We are going to build the upper cabinet now.
Line up a side, back and the other side against a straight edge.

Measure for the shelves, I measured up from the bottom 7/8" (22mm) and 3/4" (19mm) more for the second shelf. Draw a line all across.
I know we are gluing paint to paint, it's usually not a good bond. I don't like using "instant" glues, I always have to move the pieces. We will use yellow glue to do this. Please dry fit before applying any glue and take it slow.

Glue the sides onto the back outside edges.

Let this dry and set aside for a bit.

Now move to the base cabinet. Glue the drawer front and doors onto the front of the base cabinet.
You can measure and mark or go by eye. Center everything.
Set this aside.

Glue the shelves in on the lines you drew earlier.
Glue the top on to this assembly.

Glue on the face frame pieces. Make the sides of these pieces even the the edge of the sides.

Dry fit the shaped apron that goes across the top front. You may have to trim the ends. Glue the apron on.

Also, the right side of my upper cabinet was just a hair short. It made my shelves look uneven. I used a very narrow strip of card stock, doubled and glued to the bottom of the right upper cabinet. I used paint tinted glue and after everything was dry, I chipped off the extra and aged it in.

I also had to sand the right top side to make everything look even.

Glue the upper cabinet to the base cabinet, centering from side to side and the backs even.

Glue the decorative top onto the top of the upper cabinet, center it also.
Looks pretty good, for mat board. Even if someone picks it up they won't be able to tell it's mat board.

If you have some you like, use them. Or if you have right size of beads you can use them, too. I live in the middle of no-where and I've gotten used to creating what I need without driving 30 to 40 miles.
I am going to show you what I've used in the past. This is not knew and can be used in other applications, such as "gingerbread" trim. It's seen in Victorian homes, the dowel and bead type of trim that's used in the top of doorways between rooms such as the parlor and dining room.
Onto the knobs, again. I used straight pins. I used to sew, a lot. I used to own a fabric shop and I also taught quilting there. The pins are a particular type, pleating pins, they have a small head. Any type will do, though. If you have some extra dollhouse size brass nails, they will work, too.

Cut a strip of paper 2 1/2" (63mm) wide, it doesn't have to be very long, you are only going to make 4 knobs.
Put a new blade in your craft knife and sharpen your pencil.
Measure 1/8" (3mm) from the bottom corner. Measure 1/16" (2mm) from the top corner.

Align your straight edge with the 1/16" mark and out to the edge of the bottom corner. Cut this scrap piece off with your craft knife.
(I know, I turn my steel ruler over to cut.)

This is the scrap piece.

Align the ruler at the top edge and the bottom mark and cut.
Cut away from you, this saves the point.

Set this piece aside, it's one of your knobs.

From now on you will only have to measure 1/8" from the bottom corner.
The trick is turning the paper after each cut.
Pick up a bottom corner of the paper. Keep turning the paper away from you and lay it down.

Do you see the orange line of my cutting mat on the left side of my paper? Now the paper is ready to measure 1/8" at the bottom corner.
Align your ruler at the top corner and the new mark at the bottom. Cut another wedge and set it aside, too.
Flip you paper again, measure 1/8" from the bottom corner and cut another wedge. Set it aside and do the same as above one more time.

The size and shape of the "bead" is determined by the length and width of the wedge shape.
Get your tacky glue out. Dab the wide end into the glue. Wrap the wide end around the pin just under the head. Press and seal the paper to the pin. Set this aside to dry and glue the other 3 the same way.

Run a thin line of tacky glue along the wedge and start wrapping the wedge around the pin.
Take it slow, don't pull, it will catch and you will start it wrapping.
Roll the "bead" between your fingers to seal the glue.

When rolling, keep the wedge point centered. This will make an even "bead".
Let these dry before you paint them. You could paint on some gesso to cover the edges of the paper if you want. I just painted them white. I painted a dot of brass colored paint onto the head of the pin. I then coated the knob with acrylic varnish, I used Delta's PermEnamel Clear Gloss Glaze.

Measure and mark where you want your knobs, drill a hole and glue and insert your knobs.
Pretty cool for mat board, huh?
My cabinet is pretty grungy, you can use a lighter stain so it won't look as dark.
If you want to finish your cabinet like the full size ones there is one more thing you can do. I didn't include it because cutting very thin strips of mat board is difficult to do. At the seam where the top cabinet is glued to the bottom base cabinet, on the inside, there is usually a piece of quarter round moulding applied. Hobby Builders now carries quarter round moulding. Quarter round moulding is fantastic to have in your stash. It's also called shoe moulding and should be applied to your baseboard moulding at the bottom (if your baseboard doesn't all ready have it moulded in). Remember, quarter round - down; and use the cove moulings up at the ceiling. Hobby Builders, www.miniatures.com. This cabinet could use the 3/64" or 1/16". Another thing to get from Hobby Builders is the Mini Drill, #37800, $12.49. It's very useful and I keep it on my table all the time. It's a pin vice and it has 12 drill bits in the handle.
I wouldn't recommend going out to buy some sort of mat cutting system but if you all ready have one it would be good to use on this type of project.
I hope you will try this out, it will open up a whole new world of building to you. And remember,
Have fun, expand on it, make it better. . . . . .Just keep making minis!!!